Access and use data in teaching

Utilising data for decision-making is a crucial step in the design and delivery of subjects. Brightspace makes it easy for you to access and use student data to create a student-centred and adaptive experience.

This article will outline the types of data sets, data analytics, and data visualisations available to you. With a focus on subject design and evidence-based student intervention, you will find out how to use data to maximise student success.

Your subject site: Subject Overview widget

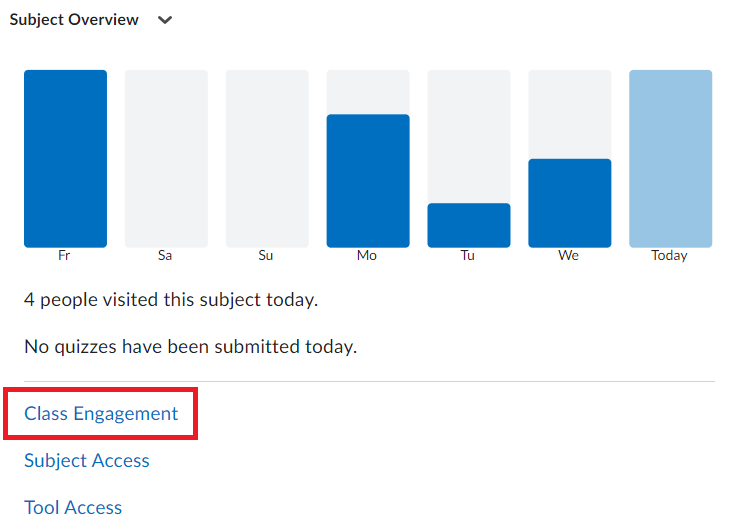
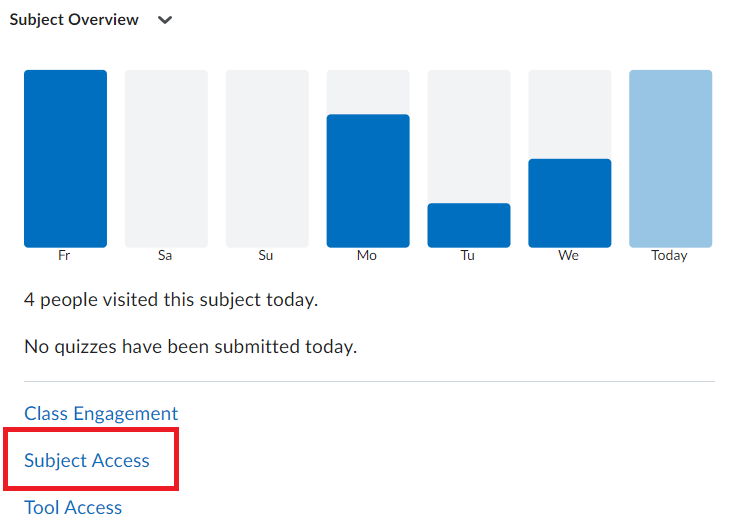
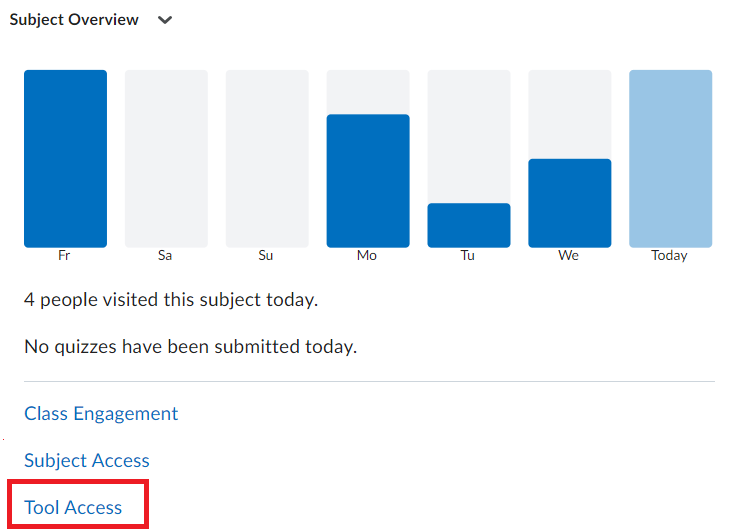
On your subject homepage, you will find the Subject Overview widget. The widget displays a visualisation of weekly subject access and how many learners have submitted quizzes that day. The widget also includes links to the:

  • Class Engagement tool
  • Subject Access dashboard
  • Tool Access dashboard

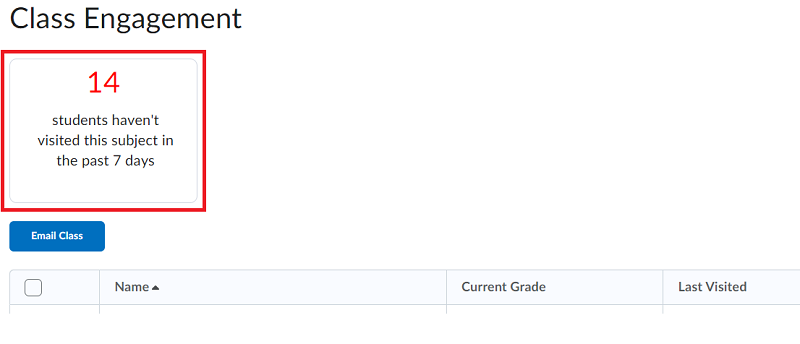
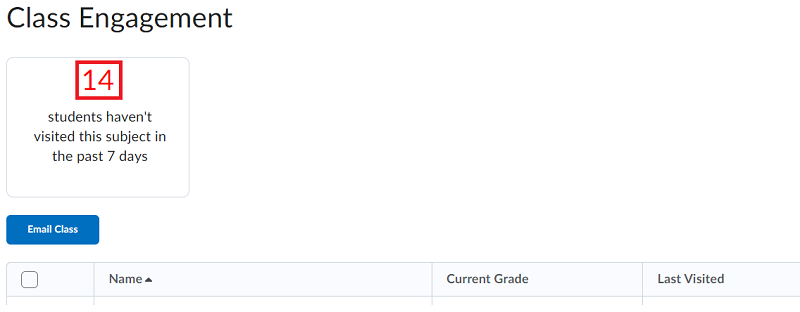
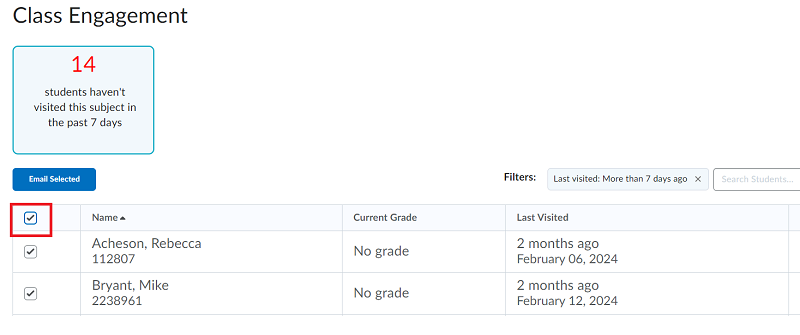
You can use this dashboard to understand user engagement in your subject. You can:

  • Identify students who have not accessed the subject in the past 7 days.
  • Identify individual students' contributions to discussion forums.
  • Send emails to students.
  1. From the Subject Overview widget, click Class Engagement.
    Screenshot of the Subject Overview widget in Brightspace. Under a bar graph, there are 3 dashboards you can select. The Class Engagement Dashboard is selected.
  2. The Class Engagement Tool will show you how many students haven’t accessed your subject in the past 7 days. 
    Screenshot of the Class Engagement tool in Brightspace. It depicts that 14 students haven’t accessed the subject in the past 7 days.
  3. The table of student names also shows the current grade and total number of discussion postings each student has made in the subject. This will include graded and ungraded discussion forums.
  4. Click on the number to filter the list to these students.  
    Screenshot of the Class Engagement tool with the number selected. It depicts that you need to click the number shown to filter to those students.
  5. To email all students, click the checkbox at the top of the table to select all students.
    Screenshot of the Class Engagement tool with the checkbox at the top of the table selected.
  6. You can also manually select certain students by clicking the checkbox next to their name.
  7. Click Email Selected. Discover effective strategies for communicating with students by exploring Intelligent Agents.

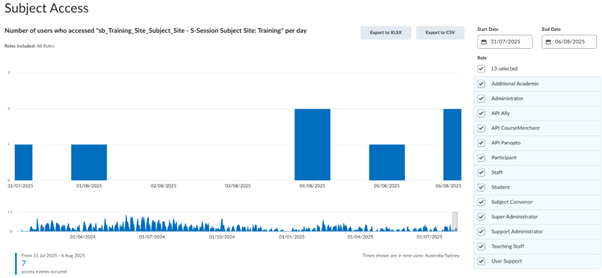
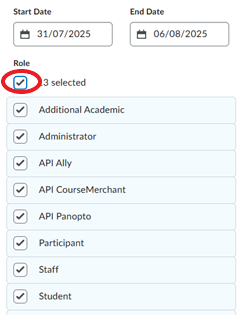
Use this dashboard to better understand activity in a Brightspace site.

  1. From the Subject Overview widget, click Subject Access.
    Screenshot of the Subject Overview widget in Brightspace. Under a bar graph, there are 3 dashboards you can select. The Subject Access Dashboard is selected.
  2. The Subject Access dashboard will show you the number of users who accessed the site per day.
    Screen capture of Subject Access Dashboard. The image depicts user access to the subject over a period of time.  Filters can be used to change the date range of the data displayed.
  3. By default, the dashboard displays the data for the past 7 days for all user roles in the subject. Use the filter options to enter different start and end dates. You can also filter by role. To do this, remove the checkmark from the Role field and select the Student role.
    Screenshot from the Subject Access Dashboard depicting how filter by roles.
  4. The graph below the bar chart shows access events from the start date of the subject through to the end date. You can click and drag your mouse in this section to modify the date range. This has the same effect as manually modifying the dates in the Filter options.
  5. You can export the data to either a Microsoft Excel format or a CSV format by clicking on the Export buttons.

Use this dashboard to better understand user engagement with subject tools.

  1. From the Subject Overview widget, click Tool Access.
    Screenshot of the Subject Overview widget in Brightspace. Under a bar graph, there are 3 dashboards you can select. The Tool Access Dashboard is selected.
  2. The Tool Access dashboard uses a pie chart to show the percentage of overall use for that tool in the period selected. The table below the pie chart shows both the percentages and the actual count of views for that tool.
    Screen capture of Tool Access – Subject Report. The image depicts a pie chart displaying the percentage of the different tools that have been accessed within the subject (e.g. Discussions, Assignments etc).
  3. Use the dropdown menu to select the period that you want to view. You can select the last 7 days, the last 30 days or the last 12 months. Below the date range, you can filter the roles you wish to include. Remove the checkmark from the Role field and select the role you wish to filter by.
  4. You can export the data to either a Microsoft Excel format or a CSV format by clicking on the Export buttons.

Your subject site: Data and statistics

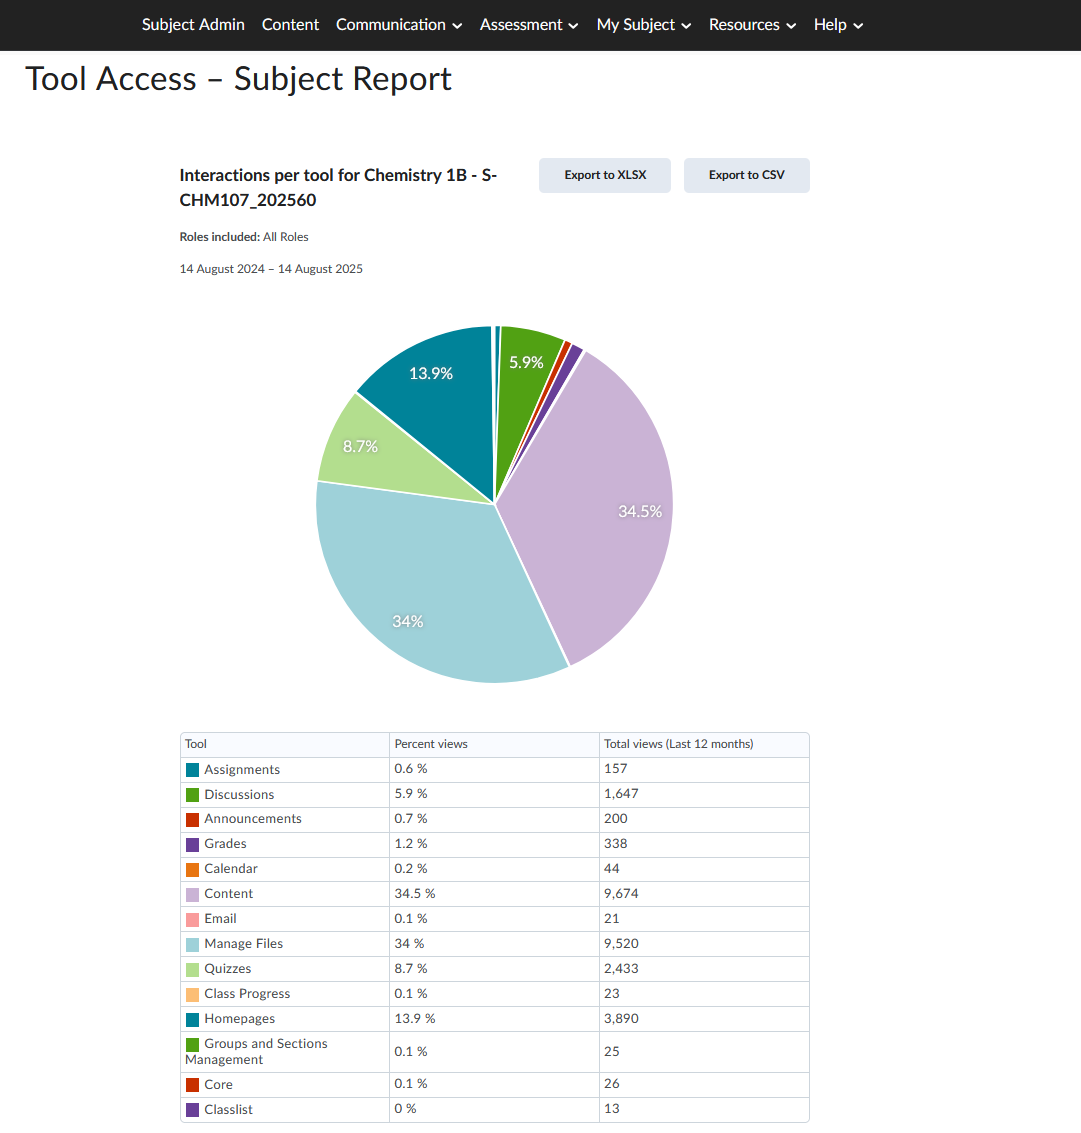
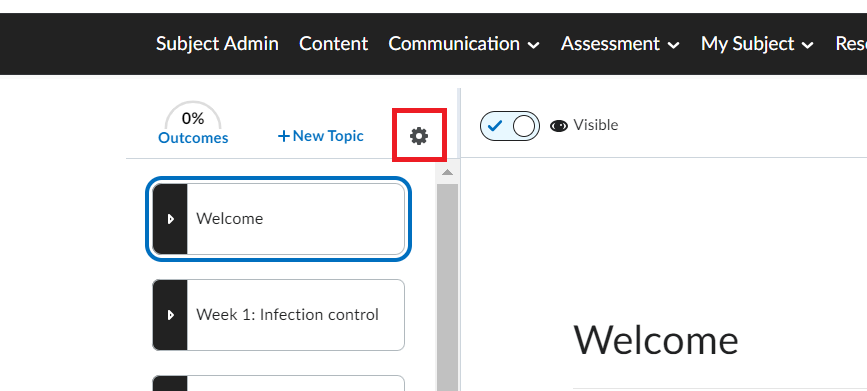
Brightspace also provides you with inline statistics for the following tools.

Subject content reports allow you to view and export the content viewing statistics. You have the option to see:

  • overall subject content statistics
  • statistics for individual pages
  • statistics for individual students
  1. Click on the Content menu in the subject navigation bar.
  2. Click on the Subject options cogwheel and click View Reports.
    Screenshot of the content tool depicting the cogwheel that you click to access content reports.
  3. You will be taken to the Reports screen which displays an overview of how many students visited the content in your subject and the average time spent.
    Screen capture of Content Report screen. The image depicts the content in the site indicating how many users it is available to and how many have accessed the content along with the average time spent on the content.
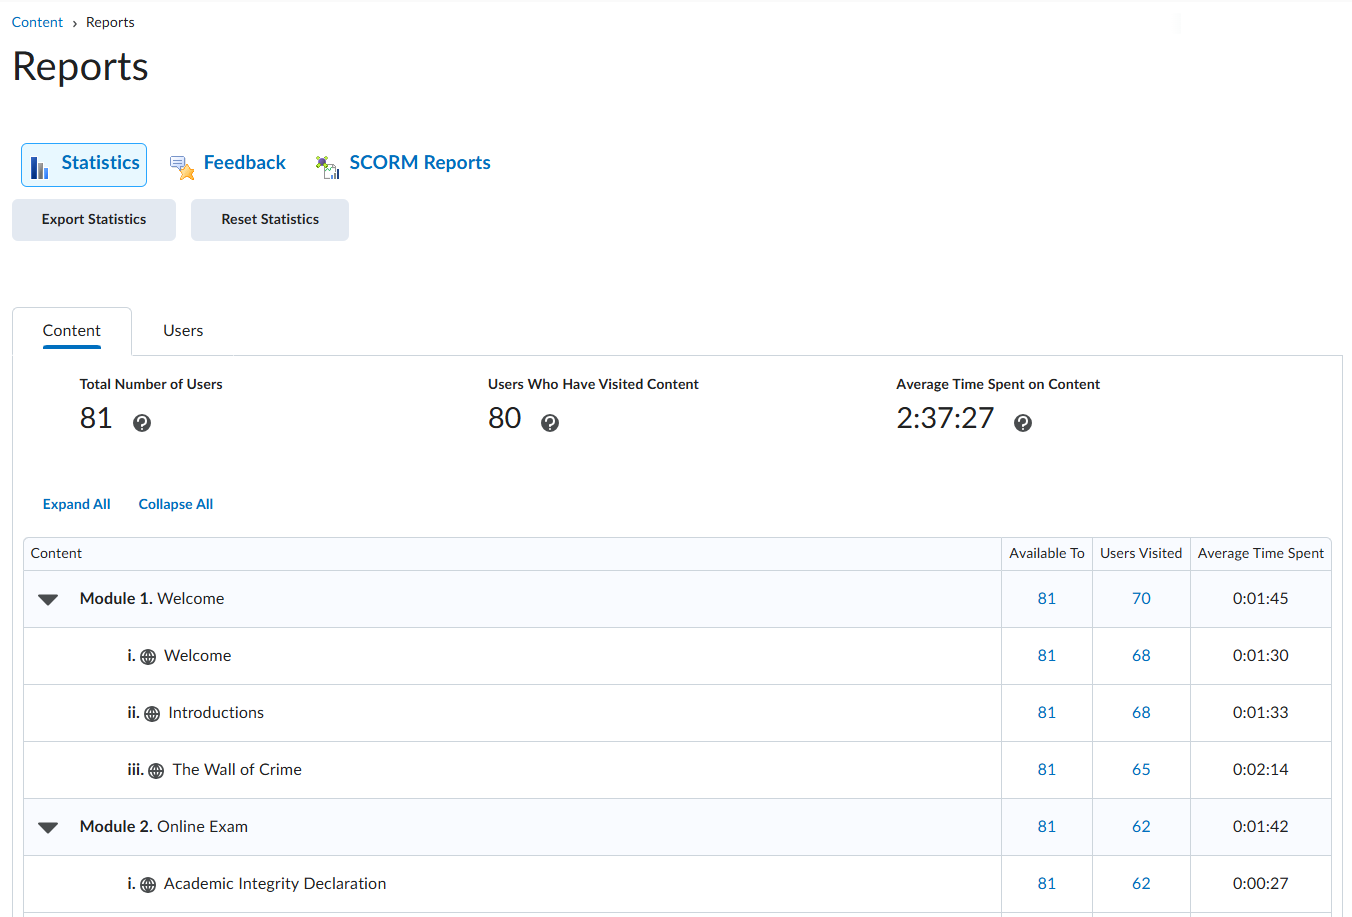
  4. Please note: Due to multiple browser configurations and use cases, tracking the time spent viewing content in Brightspace is a best estimate. For example, the following can contribute to inaccurate time tracking: running an aggressive ad-blocker, opening content in another browser tab, downloading the content/viewing it locally, or losing an internet connection while viewing content in a browser.

  5. Optional: click Export Statistics to download a csv file to your computer.
  6. Click Users to see the statistics for a particular student.
  7. Click on a student’s name for a more detailed view of their content viewing statistics.

The Class Progress dashboard allows you to view detailed student progress reports for:

  • Detailed system login and access information
  • Content completed
  • Quizzes
  • Grades
  1. Click on the Subject Admin menu in the subject navigation bar.
  2. Under Learner Management, click Class Progress.
  3. You can use the Filter to drop down menu to view a specific group or section in your subject.

    Use your cursor to hover over the System Access or Grades bars to get more detailed information for a specific student.

  4. Click on a student’s name to view a detailed progress report.

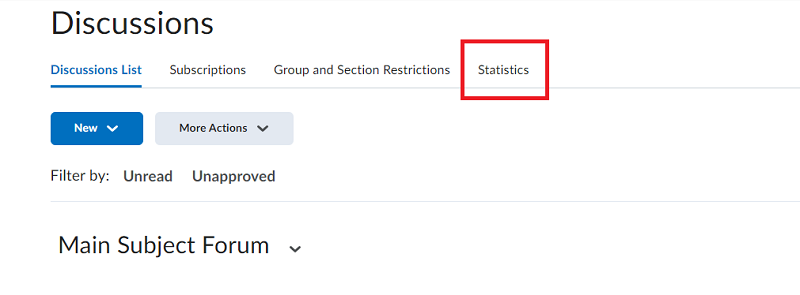
The Discussion tool has a statistics feature that provides an overview of discussion activity in your subject. These statistics allow you to monitor overall participation levels and individual student engagement.

  1. Click on the Communication expanding menu in the subject navigation bar.
  2. Click Discussions.
  3. Click on the Statistics tab where you can view:
    • Org Unit Statistics: Displays the total number of threads and replies in all forums in your subject.
    • User Statistics: Displays a table with discussion post data for each student.

    Screenshot of the discussion tool with the statistics button selected to access discussion statistics.
  4. You can use the View by filter option to view a specific group or section in your subject. You can also use the Search field.
  5. Optional: click Export to CSV File to download a CSV file to your computer.
  6. Click on a student’s name to view discussion statistics for an individual student.
  1. Click on the Assessment expanding menu in the subject navigation bar.
  2. Click Quizzes & Exams.
  3. Click on the Statistics tab.
    Screenshot of the quizzes and exams tool with the statistics button selected to access quiz statistics.
  4. In the Quizzes table, select the Quiz you want to access statistics for. Click on the tabs to view:
    • User Stats – Statistics for individual users.
    • Question Stats – Statistics for each quiz question are calculated based on each student’s first attempt on the quiz.
    • Question Details – Detailed analysis of each question.
  5. Optional: click Export to CSV or Export to Excel to download the file to your computer.

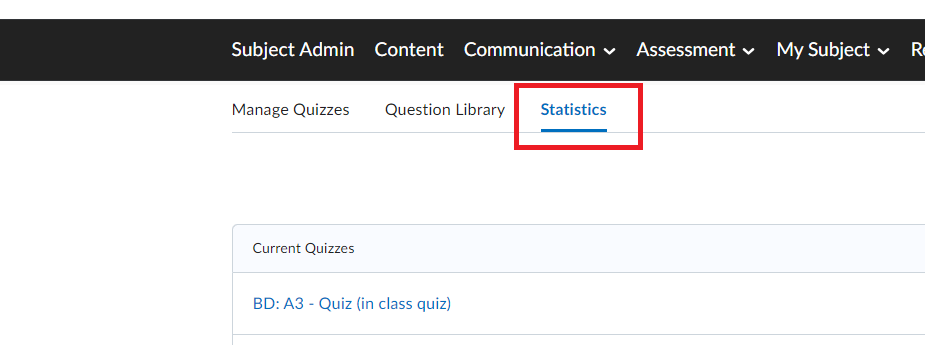
Standard Deviation (SD): tells you how much individual scores vary from the average score, ranging from 0% to 100%. A high SD indicates greater variability among scores, while a lower SD suggests that most scores are close to the average.

Keep an eye out for very low SD. This can indicate that the questions are too easy, leading to most students answering them correctly. This doesn’t provide meaningful feedback to students and doesn’t help you to effectively assess their performance.

Discrimination Index: Is a score between –100% and 100%. The higher the value, the better the question can distinguish between students who perform well overall in the quiz and those who don't. A high discrimination index is important to ensure that the quiz is accurately measuring student learning.

Point Biserial Correlation Coefficient: This is only applied to multiple choice and true/false question types that have only one correct answer. The value will be between –1.00 and 1.00. Similarly to the discrimination index, the point biserial correlation coefficient tells us whether the question relates to the overall quiz score. A high value indicates a “good” question.

You can use the Rubrics Statistics to observe trends of how students perform in each specific rubric criterion.

  1. Click on the Subject Admin menu in the subject navigation bar.
  2. Under Assessment, click Rubrics.
  3. Click on the drop-down menu next to the name of the rubric and click View Statistics.
    Screenshot of the rubrics tool with the View Statistics button selected to access rubric statistics.
  4. Click on the Competency Activities tab.
    The Competency Activities table contains the following information:
    • Object: The name of the assessment item associated with the Rubric.
    • Type: Information related to which assessment item was used (e.g., Assignment, Quiz).
    • # Assessments: The number of submissions for each assessment item.
    • Average Level: Average grade (from HD to F)
    • Average Score: The sum of each student’s score divided by the number of submissions
    • Actions: For each assessment item associated with the Rubric, there is a Statistics Icon in this column.
  5. To access the Rubric Statistics page for any assessment item associated with your Rubric in this subject, click on the Statistics Icon under the Actions header.
  6. On this Rubric Statistics Page you will find three different tabs of statistics:
    1. Overall Statistics: Here you will find the Mode and Frequency. The Mode is the most frequently earned level. The Frequency is the frequency that each level is attained (%).
    2. Criteria Statistics: Here you will find the proportion of students falling into each category of the Rubric's criteria.
    3. Individual Statistics: This page contains a Table of learners with the level and score they earned, the person who assessed them (Assessor) and when they were assessed (Date).

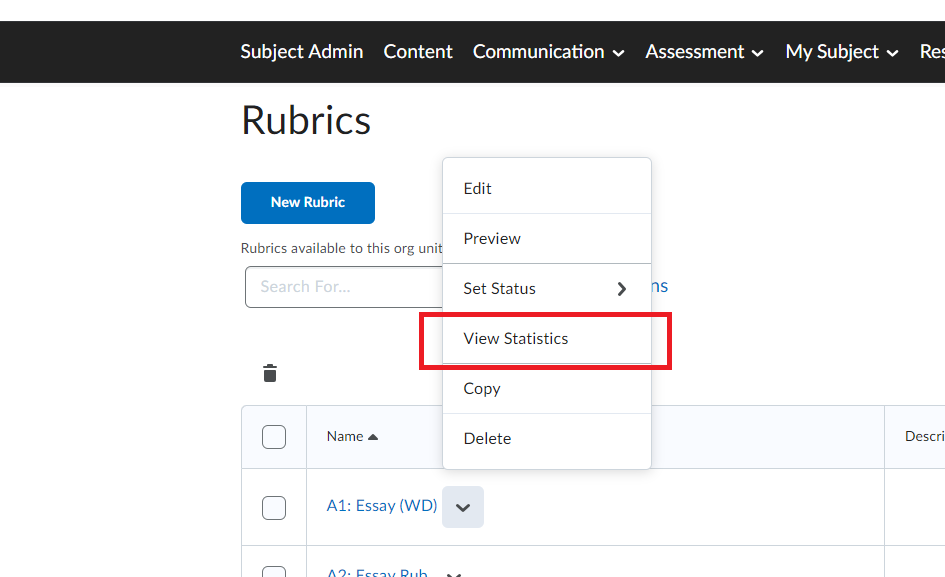
You can change which students are presented in the Table by changing what is selected in the drop-down menu next to View By and then clicking the Apply button.

Once an assessment has been completed and marks have been published to My Grades, you will be able to access both aggregate and individual student statistics.

  1. Click on the Subject Admin menu in the subject navigation bar.
  2. Under Assessment, click Grades.
  3. Select the Manage Grades tab.
  4. Click on the drop-down menu next to the grade item of interest.
  5. Select View Statistics from the drop-down menu.  
    Screenshot of the grades tool with the View Statistics button selected to access grade statistics.
  6. You now have two options for statistics to access:
    1. Class Statistics
    2. User Statistics
  7. Select the Class Statistics or User Statistics tab.

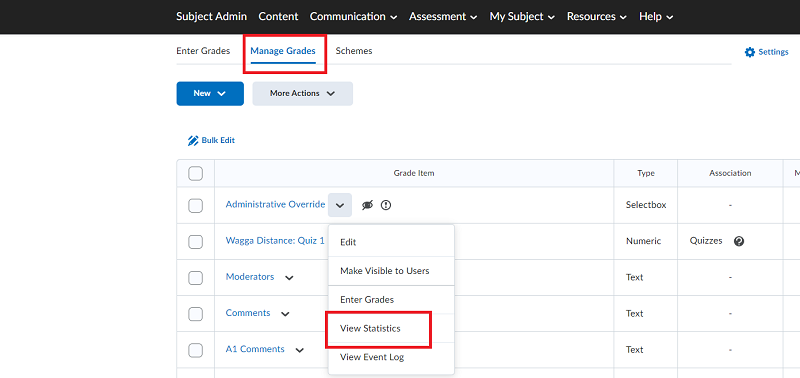
Below are explanations for each of the statistics in the Class Statistics tab.

Number of submitted grades: The numerator is the total number of grades contributing to the class statistics. The denominator represents the total number of students in the subject.

Minimum: Lowest grade (%).

Maximum: Highest grade (%).

Average: The sum of all the grades for this grade item divided by the number of submitted grades (%).

Mode: The most frequently earned grade (%).

Median: The middle grade when all grades are arranged in order from lowest to highest (%).

The average, mode and median are known as measures of central tendency. If these measurements are vastly different, your data is skewed. It could be worth investigating this further. Was there a student who received a mark that was much lower than other students? If so, why?

Standard deviation (SD): Shows you how spread out the grades are from the average. A large SD indicates that grades are spread out a lot. If SD is low, grades are closer to the average.

There is no right or wrong value for SD. Although, a SD of ~20 or more could indicate that your students have performed inconsistently. You could ask yourself:
- Why is there a large discrepancy in grades?
- Is the assessment clear and comprehensive?
- Is there subjectivity in the marking criteria?

Grade distribution: The chart shows how many students received grades within different score ranges. The vertical bars represent the percentage of students, while the horizontal axis shows the grade ranges in 5% increments.

Grade Frequency: This table shows the frequency of students receiving grades within the different score ranges

Insights portal: Data and statistics

Please note that the Insights portal is currently in development at CSU.

If you wish to know more about its potential, please refer to:  About Insights Dashboards - Brightspace

To access the Insights Portal:

  1. Click on the Subject Admin menu in the subject navigation bar.
  2. Under Administration, click Insights Portal.

Accessing student data in Brightspace is just the first step. Taking action based on what you've uncovered will optimise the learning experience and support student success.

During the teaching session, what strategies or interventions can you use to support your students? Read about Intelligent Agents to find out more.

This page may be updated at any time. If you print it, you could miss future changes. Please check this page regularly for the latest updates.